Static worksheets are dead weight in a classroom that’s gone digital. Teachers are now building Google Docs that function more like mini learning apps — complete with clickable navigation, embedded videos, and self-checking questions — all inside a tool students already know how to use. Here’s exactly how to build one, step by step, without needing any coding skills or paid add-ons.
Why Google Docs (Not Slides or Forms) Is the Right Tool
Teachers often default to Google Slides for interactivity or Google Forms for quizzes, but Docs has a specific advantage: it reads like a real document, which makes it feel less like a “test” and more like a workbook. Students scroll through it the way they’d read a digital textbook, which lowers cognitive friction for reluctant readers.
Google Docs also syncs instantly across devices through Google Drive, meaning a student who starts an assignment on a school Chromebook can finish it on a home tablet without losing progress. That’s a meaningful edge over PDF worksheets, which fragment into a dozen incompatible versions the moment students start annotating them.
Education technology surveys consistently show that over 80% of US K-12 districts now use Google Workspace for Education as their primary platform, making Docs one of the few tools nearly every student already has access to without needing a new login.
Here’s how the three tools stack up for building student-facing interactive content:
| Tool | Best For | Interactivity Level |
|---|---|---|
| Google Docs | Choice boards, reading guides, self-paced units | Medium (links, checkboxes, embedded media) |
| Google Slides | Digital escape rooms, drag-and-drop games | High (draggable objects, hyperlinked slides) |
| Google Forms | Quizzes, exit tickets, auto-graded assessments | High (branching logic, instant scoring) |
The smartest builds actually combine all three — a Doc as the “home base” that links out to a Form for the quiz and a Slides deck for a game-based activity.
Building the Navigation Skeleton with Bookmarks and Links
The single feature that transforms a plain Doc into something that feels interactive is internal linking. Instead of students scrolling endlessly, they click a “table of contents” at the top and jump straight to a section.
Here’s the exact process:
- Highlight the heading text for each section (e.g., “Part 1: Vocabulary”).
- Go to Insert > Bookmark to drop an anchor at that point in the document.
- At the top of the Doc, type your menu items (e.g., “Vocabulary | Reading | Quiz | Reflection”).
- Highlight each menu word, click Insert > Link, and select the matching bookmark from the “Headings and bookmarks” list.
- Test every link in preview mode before sharing.
This turns a linear worksheet into something closer to a website, and it’s the same underlying logic used in how to add notes in Notability to Google Drive, where linked content needs to sync cleanly between apps and locations.
A few practical tips make this system hold up under real classroom use:
- Add a “Back to Top” link after every section so students aren’t stuck scrolling backward.
- Use Heading styles (Heading 1, Heading 2) rather than manually bolding text — Google Docs auto-generates a table of contents from these via Insert > Table of Contents.
- Color-code sections (light fill colors behind headers) so visual learners can orient themselves faster.
Making It Feel Interactive: Checkboxes, Tables, and Embedded Media
Once navigation is solid, the next layer is giving students things to actually do inside the document, not just read.
Self-Tracking with Checkboxes
Google Docs has a native checklist feature under Format > Bullets & Numbering > Checklist. Students click to check off completed tasks, which works well for multi-step assignments like lab procedures or reading logs. It’s a small feature, but it gives students a visible sense of progress — something static text can’t do.
Structured Layouts with Tables
Tables aren’t just for data. Teachers use them to build:
- Choice boards — a 3×3 grid where each cell links to a different activity, letting students pick their own path.
- Vocabulary organizers — word, definition, and a “draw or describe” cell students fill in themselves.
- Comparison charts — for analyzing two texts, historical events, or science concepts side by side.
Tables also solve a real formatting headache: without them, embedded images and text constantly shift around as students type, breaking the layout. A table cell locks content in place.
Embedding Video and Audio
Under Insert > Media, teachers can drop in YouTube videos that play directly inside the Doc, no separate tab required. For audio, the workaround is linking to a Google Drive-hosted MP3 or a recorded Screencastify clip, since Docs doesn’t natively embed playable audio files.
This matters more than it sounds — a 2026 EdTech Trends report found that assignments combining text with embedded video saw notably higher completion rates among middle schoolers compared to text-only Docs, largely because it broke up the visual monotony of scrolling text.
Add-Ons That Push Docs Into “App” Territory
Native Docs features cover navigation and layout, but for auto-graded questions or drag-and-drop mechanics, add-ons are worth installing. Access them via Extensions > Add-ons > Get add-ons.
Here are the ones actually worth a teacher’s time:
- Bookwidgets — turns text into interactive quizzes, flashcards, and crossword puzzles embedded directly in the Doc via a generated link/widget.
- Pear Deck — better known for Slides, but its “Interactive Google Docs” feature lets teachers monitor student typing in real time on a shared Doc.
- Doctopus (paired with Goobric) — mass-distributes personalized copies of a template Doc to an entire class roster and attaches a grading rubric directly.
- Kaizena — allows teachers to leave voice-comment feedback directly on student writing inside the Doc.
- EquatIO — adds math equation and graph tools for STEM-focused interactive assignments.
A quick comparison of setup effort versus payoff:
| Add-on | Setup Time | Payoff |
|---|---|---|
| Bookwidgets | ~15 min | Auto-graded interactive questions |
| Doctopus + Goobric | ~20 min (one-time) | Automated distribution + rubric grading |
| Kaizena | ~5 min | Voice feedback, stronger student-teacher connection |
The tradeoff with add-ons is dependency risk — if a third-party tool changes its pricing model or shuts down (which has happened to several EdTech startups over the past few years), any Doc built entirely around it stops functioning. Native Docs features never carry that risk, which is why most experienced teachers build the core of an interactive Doc with built-in tools and treat add-ons as optional enhancements.
Distributing the Doc So It Stays Interactive for Every Student
An interactive Doc is only as good as its distribution method. Share it wrong, and either 30 students edit the same file simultaneously and destroy it, or nobody can access it at all.
The three sharing methods, ranked by classroom safety:
- Google Classroom “Make a copy for each student” — the gold standard. Every student automatically gets their own editable version, and teachers can see all submissions in one dashboard.
- Share link with “Anyone with the link can view,” instructing students to File > Make a Copy — works for non-Classroom setups but relies on students following instructions correctly, which is inconsistent below middle school.
- Editor access on the master Doc — avoid this entirely for anything meant to be individual work; it turns into a live multiplayer editing disaster within minutes.
For younger students especially, permissions matter as much as content design. This is the same underlying logic behind how Google Wallet now lets parents set up secure balances for their kids — locking down access appropriately by age group prevents both accidents and misuse, whether it’s a payment tool or a shared classroom document.
A few distribution best practices worth building into any classroom workflow:
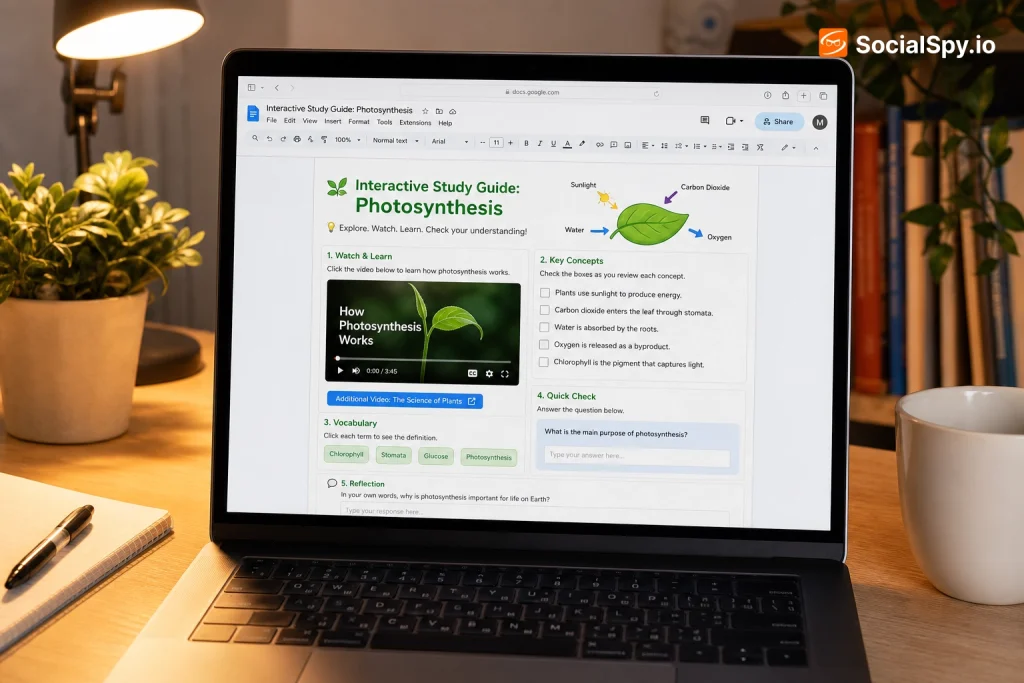
- Rename the template file clearly (e.g., “Photosynthesis Interactive Doc — MASTER”) so it’s never confused with a student copy.
- Lock the master file to “Viewer” access for anyone but the teacher once it’s finalized.
- Set a due date in Google Classroom even for ungraded practice Docs — it triggers a completion reminder in students’ dashboards.
Troubleshooting Common Problems Teachers Hit
Even well-designed interactive Docs run into predictable snags. Knowing the fix in advance saves class time.
Bookmarks disappear after copying: Bookmarks sometimes don’t survive when a Doc is duplicated through certain third-party LMS integrations. The fix is to always test one student copy after distribution before sending it to the whole class.
Embedded videos won’t play on school networks: Many districts block YouTube domains at the network level even when embedded inside a Doc. Switching to district-approved video hosting (like a school’s Vimeo account or SafeShare-hosted links) sidesteps this.
Checkboxes don’t sync properly on mobile: The native checklist feature can behave inconsistently in the Google Docs mobile app compared to desktop, particularly with older Android devices. Advise students to complete checkbox-heavy sections on a laptop or Chromebook when possible.
File size gets unwieldy with too much embedded media: A Doc packed with videos, high-res images, and tables can slow to a crawl for students on older devices or spotty Wi-Fi. Keep total embedded video count under 3-4 per document and compress images before inserting them.
Security is worth a mention too — interactive Docs distributed broadly across a school district create more entry points for account compromise. The same social-engineering tactics flagged in reports about hackers calling financial firm employees to hack and extort victims increasingly target school staff accounts too, since a compromised teacher Google account can expose an entire class roster of shared Docs. Enabling two-factor authentication on any Google Workspace for Education account isn’t optional anymore — it’s baseline hygiene.
Conclusion
An interactive Google Doc doesn’t need fancy code or a subscription to a flashy EdTech platform — it needs deliberate structure. Bookmarked navigation, tables for layout control, checkboxes for progress tracking, and embedded media for engagement cover roughly 90% of what teachers actually need, and every one of those features is already built into Docs for free. Add-ons like Bookwidgets or Doctopus are genuinely useful accelerants, but they should sit on top of a solid native foundation, not replace it — that way the resource keeps working even if a third-party tool disappears next semester. Build the skeleton first, test the distribution method with one student copy, and layer in interactivity from there.
FAQ
No — everything covered here, including bookmarks, internal links, tables, checkboxes, and media embeds, is built into the free version of Google Docs. Paid add-ons like Bookwidgets Pro can add extra features like auto-grading, but they’re optional enhancements, not requirements.
Yes, if the Doc is shared with editor access to a single master file rather than distributed as individual copies. Always use “Make a copy for each student” in Google Classroom, or instruct students to use File > Make a Copy, so each student edits their own version without touching the original.
Mostly yes, but certain features like the native checklist and multi-column tables can render or behave slightly differently on the mobile app versus desktop. For assignments heavy on checkboxes or complex layouts, it’s safer to have students complete those sections on a laptop or Chromebook rather than a phone.